How To Build A Permanent Shelter In The Wilderness
This post may contain affiliate links, full disclosure here.
A shelter is more than just a safe haven from the elements; it is also the closest thing we have to a landfill. If you want to have a more authentic camping experience or spend a lot of time outdoors, building your own semi-permanent shelter or log cabin in the wilderness is an excellent goal to strive for.
Building a permanent shelter in the wilderness begins with a thorough examination of the area for potential issues or complications.
Avoid areas prone to natural disasters or unwelcome animal presence, especially in an emergency situation. Following that is deciding on the best good shelter to base it on, with each offering a vastly different set of benefits.
Permanent wilderness shelters take time and money to build, but they aren’t nearly as difficult as people think. Camping in a tent or improvised shelter is already a wonderful experience, but putting some effort into something more long-lasting can only improve it. When figuring out which type of shelter you’ll need in a survival situation you need to keep a few of these things in mind.
Building A Shelter In The Wild
Find Your Spot
Building a long-lasting shelter necessitates a wealth of information. Getting a sense of the terrain is the most important step in creating a long-lasting shelter.
The most straightforward consideration is climate when thinking of a temporary shelter. Shelters are designed to protect you from the elements, with different elements necessitating different methods of mitigation.
A lean-to would provide adequate protection from sweltering heat and rain but would do little to alleviate frigid winters. Knowing the weather is essential for giving yourself a reasonable idea of what to expect within your planned shelter and what natural materials you have around you.
Check The Area For Disaster Possibilities
The next step is disaster proclivity, which is essentially troubleshooting what could go wrong. Areas may be vulnerable to rockslides or flash floods, and prevailing wind, both of which leave little time to prepare if any at all.
Building on sandy or marshy ground exposes the foundation to erosion over time. Water may drain into your shelter if you build lower than the surrounding terrain. Building on uncompacted materials raises stability concerns, which could jeopardize the shelter over time. Locate areas with firm, level ground for building shelters.
Building a long term survival shelter higher may make the house vulnerable to strong winds. In some cases, these have been known to rip the roofs off shelters or completely collapse them. Consider natural windbreakers in the area, but only if they do not pose any other safety risks. Notable examples include cliffsides that may drop rubble or runoff water, as well as dead trees that may collapse.
Unwanted wildlife should also be considered when looking for a suitable location. Anthills and wasp nests near your intended shelter are too dangerous to ignore. They’re also attracted to sweets and food crumbs, which could be a problem. Most insects are drawn to deep grass and still water, so keep these in mind as you scout your future.
Animals are common threats, and they are typically nocturnal. Mice are a common problem in both cities and the countryside, and they will not hesitate to disturb your sleep in order to get to their food. Bears have an extremely strong sense of smell and have been observed to be drawn to unusual scents such as human urine.
Check for signs of animal activity – tracks, droppings, and tufts of fur – before deciding on a location. If there is any indication of a bear in the area, it is best not to build. Bears have been known to crumple car doors and outrun humans in a chase.
Check Your natural resources
A readily available source of running water is ideal and should be top priority. Not having to rely solely on the water supplies you brought with you frees up time you would have spent micromanaging your intake, as well as allowing you to carry less weight on future trips. A water source is a must in wilderness survival shelters.
Still water is a breeding ground for bacteria and insects, but it can be purified with some effort. Running water is preferred because it is usually cleaner and may provide a good fishing spot. Do not construct near bodies of water, as rain can cause flash flooding, causing damage to your shelter. Rivers are also known to attract animals, so a safe distance from the shelter is required to keep unwanted intruders at bay.
Wood is a great resource to have on hand for homestead construction, as it allows for significant cost savings. The presence of trees and tree trunks also reduces the risk of erosion for nearby soil, making the entire area safer. Large trees make excellent building material, while smaller branches and twigs make excellent kindling.
Building materials that are readily available may also save time and money. Stone is a useful building material because it does not catch fire and acts as a great buffer around firepits. Clay is another good option that can be found on riverbanks and used to windproof a house. Large leaves can also be woven together to provide waterproofing, with palm being the most common example.
Types of survival shelters
Lean To Shelter
A lean-to is by far the simplest and most popular shelters to make, and it can even be constructed entirely from materials found in the surrounding area.
Clear the soil around the building site until it is as flat as possible. Cut a few short logs of wood and stack them, with a few small stakes wedged around them to keep the logs from rolling. This keeps you off the ground and provides comfortable flooring. Make sure to space the log sets 8 feet apart – this provides just enough space for most people to lie down comfortably.
Drive two sets of long poles deep into the ground in front of the flooring for the main supports. This can be done with a single pole, but using two or more greatly improves the lean-stability to’s in the event of rain or snow. Connect the two poles with some long, sturdy branches.
Finally, the roof is formed by long branches leaning on the structure’s top – hence the name. Simply stack a layer of branches on top of the existing foundation, preferably at more slanted angles to allow the roof to shed unnecessary weight from debris or rain. To provide some weatherproofing, cover the slanted roof with foliage or a tarp.
In hot weather, a lean-to provides shelter from the sun and rain. The extent of what snowier regions have to offer is limited to dry flooring and elevation. The openness of the lean-to may also expose people to pests such as rodents and raccoons.
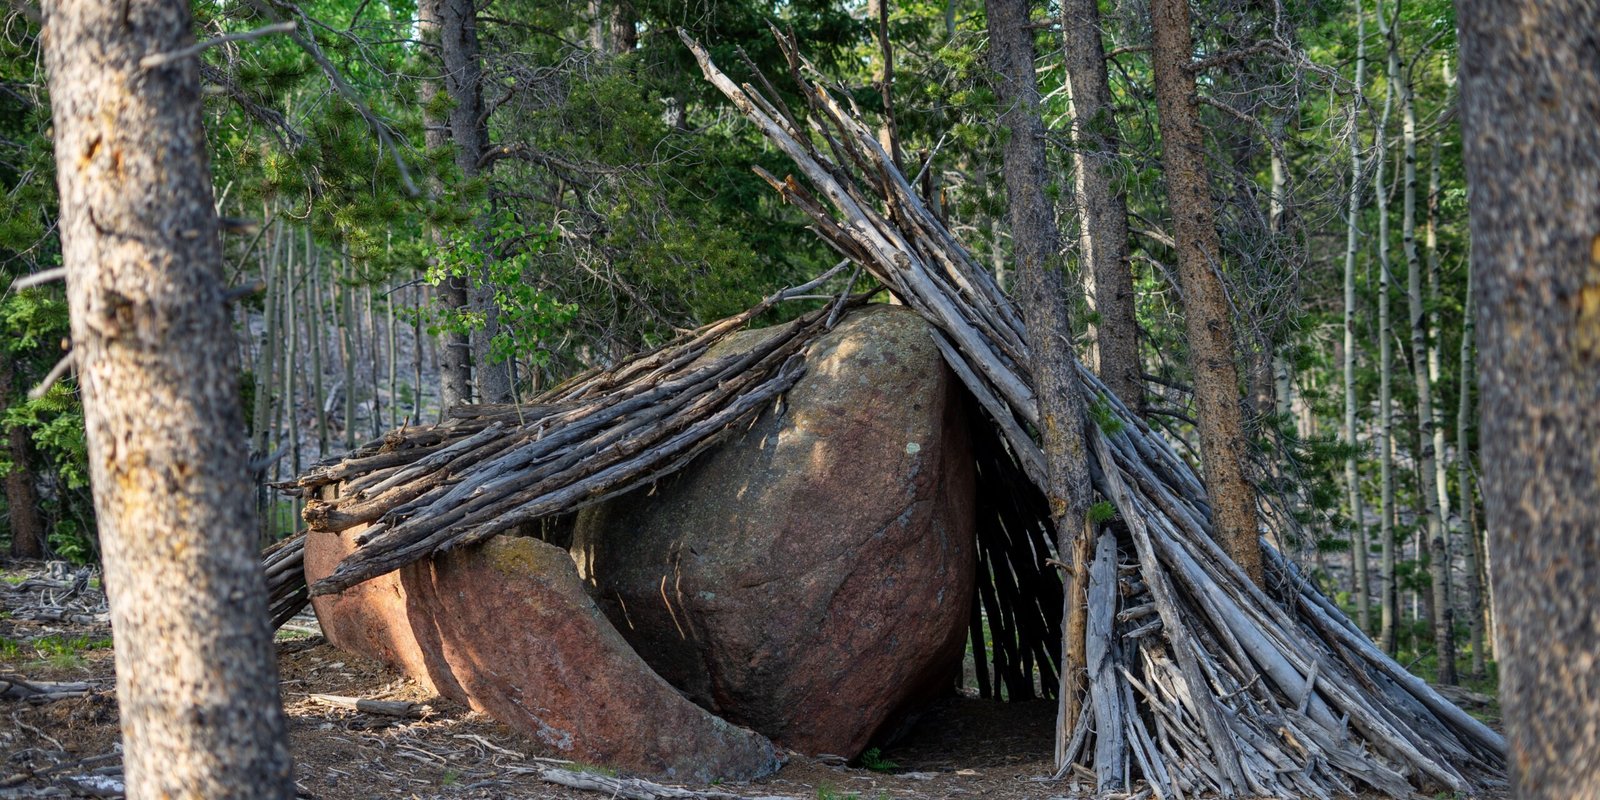
Wikiup
The wikiup provides significantly better protection than the barebones lean-to but requires significantly more time and effort to complete. It is a shelter that is commonly associated with Native Americans and is still in use today due to its practicality in most environments.
Gather a few long branches capable of supporting the structure – three can suffice, but six or more main support structures for the wikiup’s frame is preferable. Set them firmly in the ground, then bend them inward to form the roof’s center. Tie the pieces together with paracord, rope, or vines.
Reinforce the wikiup with ropes or other softwood branches tied around the foundation’s circumference at various elevations. Make a point of tying them around points of intersection. Fill in the structure’s gaps with additional wood and greenery as needed. Remember to insulate the ground with protective layering – foliage will work well in any environment.
The wikiup is a multi-purpose shelter that protects from wind, heat, and cold. Larger structures can even accommodate an indoor firepit. This is useful in warmer climates but is especially useful in colder climates. With construction efforts being brisk, the wikiup is ideal for long-term use.
Log Cabin
The log cabin is most likely the most grandiose permanent shelter to construct, as well as the most resource and time-consuming. There isn’t much to offer in terms of concrete plans because each log cabin is tailored to specific specifications and different available means.
The most important consideration for log cabins is planning. Unlike lean-tos or wikiups, preparation entails more than just flattening the area and digging a few poles into the ground. The average log cabin can take anywhere from 9 months to 22 months to build, depending on the legal considerations and budget allocation.
Log cabins are subject to permitted development rights, which allow homeowners to make certain changes to their property. These are usually subject to restrictions, such as being limited to a certain square foot area or not being used for living quarters.
The main takeaway is that the project’s construction efforts require all legal concerns to be cleared and adhered to. Otherwise, you risk losing all of the money you put into the project, and you may even face legal consequences.
Log cabins are excellent investments for permanent shelters, but they are much more expensive than alternatives. The scope of the project necessitates legal considerations that other permanent shelters rarely necessitate. Log cabins are one of the most enjoyable and protective dwellings available if those concerns are planned for and addressed.
Other Emergency Shelter Ideas
Burrow inside a hollowed-out tree or fallen log for a comfortable night’s sleep.
Protect yourself from the elements by hiding at the entrance of an abandoned cave or behind a rocky overhang.
A tree with a dense canopy of leaves is preferable to none.
Larger fallen logs and stones might act as a windbreak or the back wall of a low shelter.
Hollow out the earth sufficiently to sleep in it in arid areas. Cover the aperture with thick limbs and a few dense branches, then cover the bottom with leaves or grass. As illustrated in this video, you can even create a long-term shelter this way.
Find a sheltered spot on a hill so rain drains away from you in rainy weather or damp areas, or if possible, create a raised sleeping space using a layer of pebbles under leaves and grass (more).
In nature, the cross or “T” form is unusual. To make it easier for search and rescue crews to find you, lash two limbs together in this shape and dig into the ground near your shelter using cording, duct tape, or your shoelace.
To draw the attention of aircraft, attach a mirror, pop can, or anything else that will shine sunlight to your “T” or even the tallest point of your shelter or a neighboring tree.
Cautions and Other Tips
- It’s best to create a single shelter for many people and settle in together for increased warmth.
- Pay attention to your surroundings. More insects live in dense shrubs and on lower ground. Check for ticks, fire ants, bees, wasps, deadly snakes, and scorpions in your chosen location.
- In caverns, stay near the entrance and keep an eye out for creatures seeking refuge from the weather.
- Keep any tools sharp, and where possible, use gloves and heavy protective clothes. Cut away from the body and keep an eye out for any potential injuries from slips or misses.
- Smaller shelters are simpler to keep warm, so just build as big as your group need.
- Make a small fire at the aperture, either in a pit or with rocks around it. Make sure the area is clear of anything that might catch fire, and have earth, water, or even sand on hand to deal with any stray embers or fires.
- Extra heat can be obtained by stacking hot rocks in your shelter. If you need to start a fire within your shelter, make sure you have enough ventilation.
- Consider probable fire pathways and take appropriate safeguards if strong winds are expected.
- Always let someone know your intended route and destination, and keep them updated on any changes.
- If you need to use a stove or lamp inside your shelter, be careful and switch it off when not in use. Carbon monoxide is a poisonous gas that may kill you.
- To help preserve heat and keep animals away, partially cover the entrance with stones, tree branches, or fallen logs.
- When scavenging for resources, keep in mind that objects might come in handy in a hurry. Shelter supplies include rope, discarded paper, a lost shoe or boot, broken plastic tarps, ponchos, and even ripped parachutes.
How To Build A Permanent Shelter In The Wilderness Bottom Line
Permanent shelters are ideal places to unwind and enjoy the natural environment. Furthermore, they are a good investment for emergency preparedness. It’s critical to think about what each shelter has to offer and whether you’re willing to put in the time and effort to pull it off.