How To Dehydrate Food For Long Term Storage
This post may contain affiliate links, full disclosure here.
One of the most crucial abilities you can have is the ability to preserve food. It allows you to save money while eating more nutritious local foods. You can also use it to stock up on food in case of an emergency, a survival situation, or just bad luck.
You could be having problems determining which ways to utilize if you’ve opted to preserve your own food. Let’s speak about the advantages of dehydrating food before we get into particular procedures.
Why Dehydrate Food?
One of the oldest ways of food preservation is dehydration. Long before canning jars or freezers were invented, it was employed by many different cultures as a way to preserve their produce. It is still one of the most effective strategies today, for a variety of reasons…
No electricity or fuel is required to dehydrate and preserve food. You won’t have to worry about a power outage spoiling all your hard work, unlike frozen meals. Food that has been dehydrated and stored in an airtight container can last for years. It doesn’t even take much energy to dry it. (We’ll go through a couple of energy-free drying options later.)
Dehydration necessitates less effort. You still have to process your food, but once it’s in the dehydrator, you may walk away and work on something else. It’s not possible to sit around and watch a pressure canner or blanch veggies for freezing.
Additives aren’t required for dehydrated food. When canning or preserving food in another manner, you may need to add a lot of salt, sugar, vinegar, or other additives to help maintain the food’s color and texture. Dehydrated food, on the other hand, can be as easy as slicing something up before drying it.
Dehydrating Methods
Electric Dehydrator
An electric dehydrator is the most frequent way of dehydrating food. These dehydrators are widely accessible and offer a wide range of features and prices. If you’re not sure if you’ll love drying food, a tiny, budget-friendly dehydrator can be a good place to start before investing in a larger one.
Many dehydrators offer temperature controls that make it simple for even the most inexperienced users. For example, “herbs” at a low temperature and “meat” at a high temperature.
This dehydrator is quite economical, includes temperature settings, and would be an excellent choice for someone who is new to dehydrating.
Solar Dehydrator
A solar dehydrator is another excellent alternative. While they aren’t as easily available as the electric models, they are quite simple to manufacture. Many free blueprints are available on the internet, and the components are reasonably priced.
Air Drying
It may be possible to air dry some foods, especially if you reside somewhere with low humidity. Jerky and other items can be dried on simple screens in the desert southwest. True sun-dried tomatoes are made using this process.
Despite the increasing humidity, Appalachians have traditionally air-dried green beans by stringing them onto a long string and hanging them until the next winter. Leather britches are the name given to these bean strings.
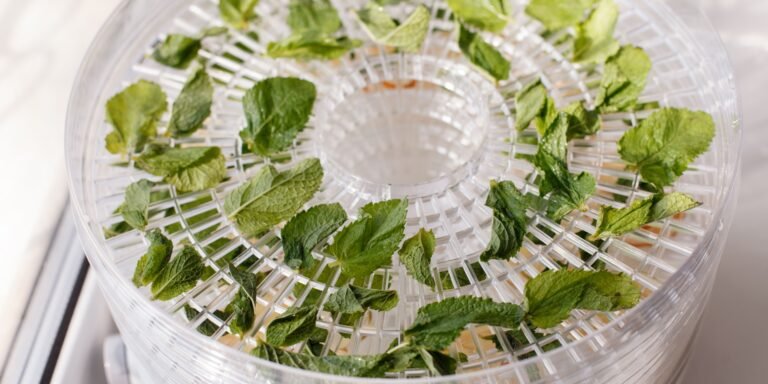
When herbs and greens are strung up or spread out on a screen, they dry quickly. If you decide to hang them, keep in mind that some herbs should be hanged in a brown paper or cloth bag because they may come apart as they dry.
Heat Source
Over a wood stove or heater, some people hang nets or set up screens. You’ll want to make sure it’s not too close to the heat source so that the food cooks instead of dries with this method. It’s a good idea to keep a thermometer on your drying rack to keep an eye on the temperature.
During the summer, you can even dry food in your car. You don’t want it to become too hot, just like a wood stove or heater, so keep a thermometer near the meal and open the car windows if required.
Oven
This is an excellent choice if you don’t want to invest in a dehydrator but still want to experiment with dehydrating food. (It’s also helpful if your dehydrator isn’t working.)
What you’ll need is the following:
If you want to retain the colour and flavour of fruits, they must be pre-treated. Rather than blanching them, simply dip them for a minute in a mixture of lemon juice and water before placing them on the cookie sheet. Dipping is the term for this procedure, which is designated “dip” in the chart below.
Preheat the oven to 350°F. You want the temperature to be high enough to dry the food but not so high that it cooks it. The temperature should be around 140 degrees Fahrenheit. However, because most ovens don’t have a low setting, you’ll have to utilise the “Warm” option.
To assist circulate the air, keep the oven door open a few inches and a fan blowing toward it. For drying times, see the chart below.
- An oven that can maintain a temperature below 200 degrees Fahrenheit (most ovens include a “Warm” option).
- To aid air circulation, a modest fan might be used.
- So you don’t get germs on the food, wear vinyl gloves.
- Knives for slicing and dicing your meal.
- Pre-treat fruits with lemon juice.
- You’ll need a large pot to blanch your stuff first.
- Cookie sheets or pans
Put your gloves on and begin sorting, washing, and slicing your food. Make sure to remove any “poor places” as well as seeds and cores. Make sure the fruits’ interior parts are exposed to air.
Prepare your vegetables by blanching them. Boiling items and then cooling them in ice water is what this method entails. This helps to keep the flavor and texture of the food. Most dishes simply require a few minutes of boiling time. When they’re tender but still a little undercooked, they’re done. See the chart below for blanching times.
Allow the vegetables to cool in the ice water for a few minutes before spreading them out in a single layer on a pan or cookie sheet.
Fruits To Dry
- Apples (7-15 hours)
- Apricots (20-28 hours)
- Cherries (13-21 hours)
- Figs (20-25 hours)
- Peaches (8-16 hours)
- Pears (8-16 hours)
- Persimmons (10-19 hours)
- Strawberries (5-15 hours)
Vegetables To Dry
- Asparagus (5-6 hours)
- Green Beans (6-12 hours)
- Beets (7-12 hours)
- Carrots (6-10 hours)
- Corn (6-10 hours)
- Eggplant (5-8 hours)
- Leafy Greens (3-7 hours)
- Mushrooms (3-7 hours)
- Onions (4-8 hours)
- Peas (4-8 hours)
- Peppers/Chili Peppers (4-8 hours)
- Potatoes (6-14 hours)
- Pumpkin/Winter Squash (8-11 hours)
- Summer Squash (10-14 hours)
- Tomatoes (5-9 hours)
- Yams (7-11 hours)
- Zucchini (6-11 hours)
Dehydrating Tips
• If you’re storing something for a long time, make sure it’s completely dry. This means that when you bend numerous meals, they should break.
• You may want to conduct some meal planning in order to make the most of your dried food. While some dried meals rehydrate rapidly, some take a while to rehydrate, so don’t expect a speedy lunch. If you’re not used to it, remembering to soak or prepare specific items can be difficult.
• If you’re intending to dehydrate more liquid foods like spaghetti sauce or fruit leathers, look for a dehydrator that has reusable sheets instead of merely screens for the racks.
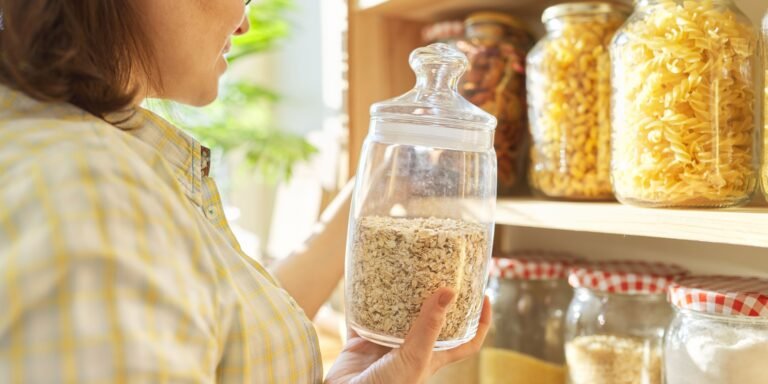
How to Store Your Dehydrated Food
Dehydrated food is one of the easiest foods to keep for a long time because it takes up little space and does not require energy. To keep your dried food fresh, simply wrap it in airtight containers and store it in a dark spot, such as a cupboard or cellar.
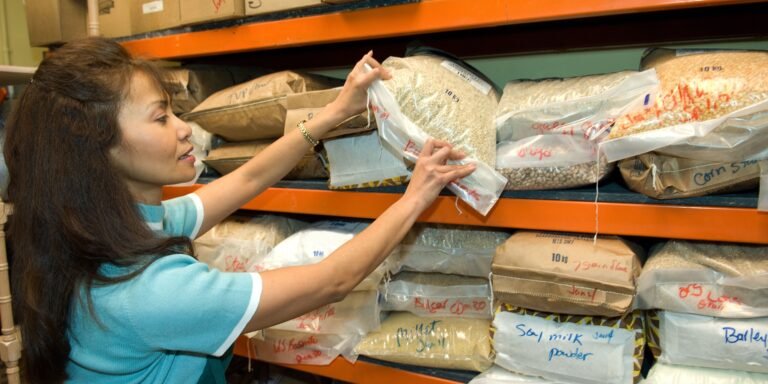
Containers that are good to use include:
Tupperware that is airtight — If you have extra Tupperware, it will work for food storage if it is airtight. Glass or plastic can be used.
- Canning Jars — If you want to avoid using plastic, these are a great option. They may also be reused year after year, which is beneficial to both the environment and your budget. Plus, because so many people can use them and they’re simple to sterilize, you can find them at yard sales and second-hand stores for a low price.
- Freezer bags – Freezer bags are probably the most cost-effective method, especially if you’re just getting started.
- Vacuum Bags – If you have a vacuum sealer, vacuum bags can be a great way to keep food fresh for a long time while also keeping it compact and making the most of your storage space.
- Mylar Bags with Oxygen Absorbers — Mylar bags with oxygen absorbers are another long-term storage solution. If you use this method, make sure the amount of food in each bag can be consumed in a fair amount of time, or else you’ll have to repackage it.
- Food Grade 5 Gallon Buckets with Gamma Seal Lids – Food grade buckets with gamma seal lids are an excellent alternative for storing big quantities of food for a long time. They can contain a lot of food and keep damp and air out. You can also use oxygen absorbers to extend the shelf life of your food.
Solid containers are recommended for preventing more delicate foods from being crushed or pulverized during storage. Bags of food can also be packed into a larger container, such as a five-gallon bucket.
Remove your food and re-dry and repackage it if you discover moisture within a container. Any food that shows signs of spoilage, such as mold or strange odors, should be discarded. For beginners, clear containers are ideal since they allow you to keep an eye on your food until you’re sure you’ve gotten the swing of things.
Food dehydration is a safe and simple approach to preserving food at home. With little or no financial investment, you may get started right away. Knowing how to dehydrate food is an excellent tool to have in your skillset, whether you’re a prepper, homesteader, hiker, or a combination of all three. It will assist you in eating more healthy local foods, preparing light, quick meals, and preparing for emergencies.
I highly recommend Tammy Gangloff’s The Ultimate Dehydrator Cookbook for thorough instructions on how to dehydrate various items. It includes recipes for almost every dehydratible item.
![Best Emergency Food Bars For Your Survival Pantry [That Don’t Taste Too Bad]](https://preparinginthecity.com/wp-content/uploads/2021/09/Best-Emergency-Food-Bars-for-Your-Survival-Pantry-768x384.jpg)