How to Start Prepping on a Budget: A Step-by-Step Guide
This post may contain affiliate links, full disclosure here.
Quick answer: you do not need to spend much to start. Begin with what you already have, then add a little each week in this order: water, food, light and a radio, first aid and medications, copies of documents and cash, then warmth and sanitation. Ready.gov suggests building a basic kit with several days of supplies, and you can do it in small, inexpensive steps over a few months.
Preparedness is not a luxury hobby. A small, steady plan beats a big shopping spree that you never finish. This guide shows how to get organized, set priorities and build a basic emergency supply on a limited budget, using free resources and everyday items first.
Start by understanding your risks
Different places face different hazards: hurricanes, tornadoes, earthquakes, wildfires, floods, winter storms, long power outages. Spend an hour learning which ones are most likely where you live. Ready.gov and your local emergency management office list local risks, and FEMA’s National Risk Index is a free tool that shows hazards by county. Plan for the likely ones first, rather than rare, dramatic scenarios.

Set your priorities
When money is limited, the order of purchases matters more than the brand. A sensible order is:
- Water: at least one gallon per person per day, for several days.
- Food: a few days of non-perishable food you already eat.
- Light and information: flashlights, batteries and a battery or hand-crank radio.
- First aid and medications: a basic kit and a supply of any prescriptions your provider will allow.
- Documents and cash: copies of key papers and a small stash of bills.
- Warmth and shelter: blankets, extra clothes and a way to stay dry.
- Sanitation: garbage bags, wipes, soap and toilet paper.
- Extras: tools, a power bank, a map and a plan.

Water on a budget
Water is the cheapest, most important item to start with. You can store tap water in clean, food-grade containers, which costs almost nothing, and the CDC says to label and date them and replace home-filled water every six months. Buy a few cases of bottled water when it is on sale, and keep unscented household bleach on hand to treat questionable water, using the CDC dosing in our guide to storing water for emergencies. Boiling is free: one full minute at a rolling boil, or three minutes above 6,500 feet. If you want a filter later, read about the methods to purify water, and remember that portable filters do not remove viruses on their own.

Food on a budget
You do not need freeze-dried buckets to begin. Buy a few extra cans, boxes and bags of foods your family already eats whenever you shop. Rice, dried beans, pasta, oats, peanut butter, canned vegetables, fruit, soup and tuna are inexpensive and shelf-stable. Add a manual can opener. Choose foods that need little cooking, because you may not have power. The USDA says unopened low-acid canned foods keep for two to five years and high-acid ones for 12 to 18 months in a cool, dry place, so rotate by using the oldest first. Our guides to canned foods and prepper foods have more ideas.
Use what you already have
- Flashlights, candles and batteries in drawers: gather them in one place. Use flashlights, not candles, as your main light.
- Camping gear: sleeping bags, tents, stoves (outdoor use only) and water bottles already count.
- Clean 2-liter soda bottles can hold stored water if washed and sanitized; check the CDC advice on containers.
- Blankets, coats and boots from closets can form your warmth kit.
- A cooler can keep food cold for a while in an outage, with ice.
- Old backpacks and bins work as go bags.

Get organized
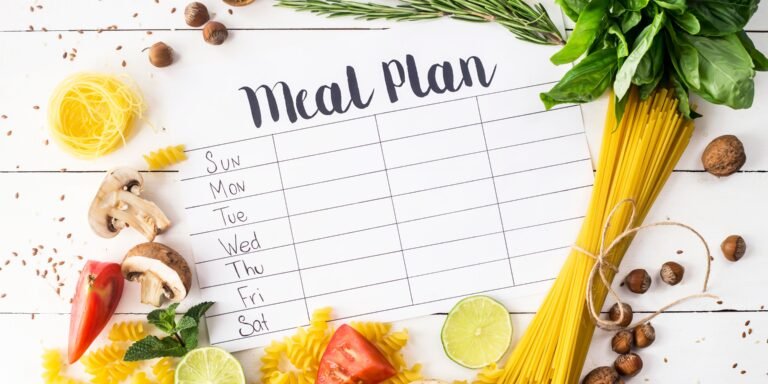
Write a list of what you have and what you need, set a small weekly budget and tick items off. Keep supplies together in one or two bins, labeled and easy to reach. Ready.gov suggests storing items in airtight plastic bags and keeping them in a designated place that everyone knows. Put a reminder in your calendar to check dates twice a year.
Free and low-cost steps that matter
- Sign up for local emergency alerts and the National Weather Service warnings, and download the FEMA app.
- Make a family plan: meeting places, an out-of-area contact and routes.
- Copy your important documents and store them electronically or in a waterproof container.
- Take a free or low-cost first aid and CPR class from the Red Cross or a local organization.
- Learn where your water, gas and electric shutoffs are and how to turn them off.
- Check on neighbors, especially older adults. Community is a form of preparedness.

Build your skills
Skills cost little and make your supplies more useful. Practice cooking with a camp stove outdoors, turning off utilities, using a map and compass and boiling water. Stay fit enough to walk several miles with a pack if you had to leave. Our guide to long-term outdoor survival has more ideas.

Get a go bag ready, slowly
A go bag is a lightweight kit for each person that holds the basics if you have to leave. Start with an old backpack and fill it a few items at a time, using our 72-hour kit checklist. Keep a smaller kit in your car, using our car emergency kit checklist.
Stay informed, but do not panic-buy
Pay attention to local alerts and credible sources, and avoid buying out of fear after a headline. Prices are often highest when everyone is shopping. Slow, steady buying saves money and avoids waste. If money gets tight, pause your plan and keep what you have rotated.
Frequently Asked Questions
How much does it cost to start prepping?
You can begin for very little by using what you have, filling clean containers with tap water and adding a few cans or boxes of food each shopping trip. Many people build a basic kit over a few months.
What should I buy first?
Water and a few days of food, then light, a radio, first aid supplies, documents and cash.
Do I need expensive freeze-dried food?
No. Canned goods and dry staples that you already eat are cheaper and easy to rotate.
How much water should I store?
At least one gallon per person per day for several days, with two weeks as a good goal, according to the CDC.
Where can I get free help?
Local emergency management agencies, the Red Cross, FEMA and Ready.gov offer free guides, alerts and training.

Bottom line
Prepping on a budget is about order and consistency, not spending. Start with water and food, use what you own, add a little each week, learn key skills and review your plan twice a year.




2 Comments
Comments are closed.